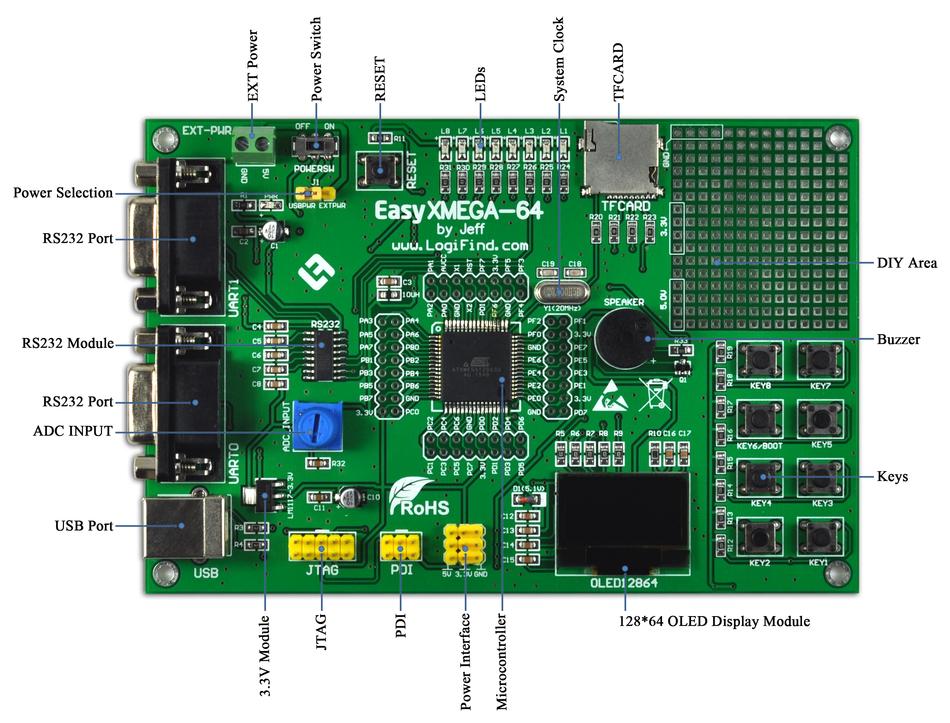
OverView/What's on board
|
Power
|
Powered from USB bus or from an external 5V power supply using an onboard 3.3V regulator LM1117-3.3V.
|
|
Bootloader,USB and RS232
|
Bootloader inside the xmega128A3U makes programming easily without any external programmer/debugger.
|
| USB PORT for creating a USB device easily,and it is a good USB solution without any other ICs. |
|
RS232 Circuit and 2 DB9(F) are included for RS232 communication.
|
|
Onboard Chips
|
ATxmega128A3U microcontroller can be separated from the motherboard
|
|
MAX3232, RS232-UART chip, communicating with the host computer via two RS232 interface
|
|
Module and Interface
|
A beautiful OLED is included,which has 128*64 dot matrix panel.
|
|
TF/MINI SDCard Slot, Read/Write via SPI
|
|
Passive Buzzer, plays music via PWM
|
|
RS232 Interface
|
|
Analogous Circuit
|
Adjustable Resistor, whose Mid-terminal connects to the AD interface of xmega, for AD experiment
|
|
Human-computer Interface
|
8 LEDs
|
|
8 buttons for user application,and one of them for bootload enable.
|
|
Other Resources
|
8MHz external crystal
|
| Prototyping area for DIY |
|
Indicates all the GPIO
|
|
Emulation/Program Interface
|
JTAG Interface (10 PIN), compatible with official standard from ATMEL
|
|
PDI Interface (6 PIN), compatible with official standard from ATMEL
|
///////////////////////////////////////////////////////////////////////////////////////////////////////////////////////////////////////////////////////////////////////////////////////////////////////////////////////////////
Introduction to Xmega128A3U
XMEGA128A3U device now makes easy to implement and use USB. The XMEGA128A3U with USB interface can be factory configured or reprogrammed
with a USB boot loader located in the on-chip flash boot section of the controller.This USB boot loader allows performing in-system programming (ISP) from a USB
host controller without removing the part from the system, and without any external programming interface other than the USB connector.
///////////////////////////////////////////////////////////////////////////////////////////////////////////////////////////////////////////////////////////////////////////////////////////////////////////////////////////////////
Why choose this board for Xmega?
- Newest XMEGA microcontroller comes with USB .
- Great board with prototyping area for building your Xmega project.
- An external programmer is no need,the Xmega bootloader makes programming very very easy.
//////////////////////////////////////////////////////////////////////////////////////////////////////////////////////////////////////////////////////////////////////////////////////////////////////////////////////////////////////
What's?software used for downloading HEX?And Do I need an external programmer for this board?
Atmel provides bootloader and a USB host loader application called FLIP which works with several Windows? OS.
Bootloader for Xmega128A3U Microcontroller:
http://www.atmel.com/Images/AVR1916.zip
FLIP Software for uploading:
http://www.atmel.com/tools/FLIP.aspx
The XMEGA128A3U microcontroller has been factory configured or reprogrammed with above bootloader located in the on-chip flash boot section of the controller.So you can use the
self-programming apllication directly and no need an external programmer.
////////////////////////////////////////////////////////////////////////////////////////////////////////////////////////////////////////////////////////////////////////////////////////////////////////////////////////////////////////
How to download HEX using FLIP?
Once the boot loader is properly recognized and installed on the operating system,the part can be programmed using FLIP. This section gives a short step-by-step
introduction about how to use FLIP to program a part. For detailed documentation,please refer to the online help for FLIP.
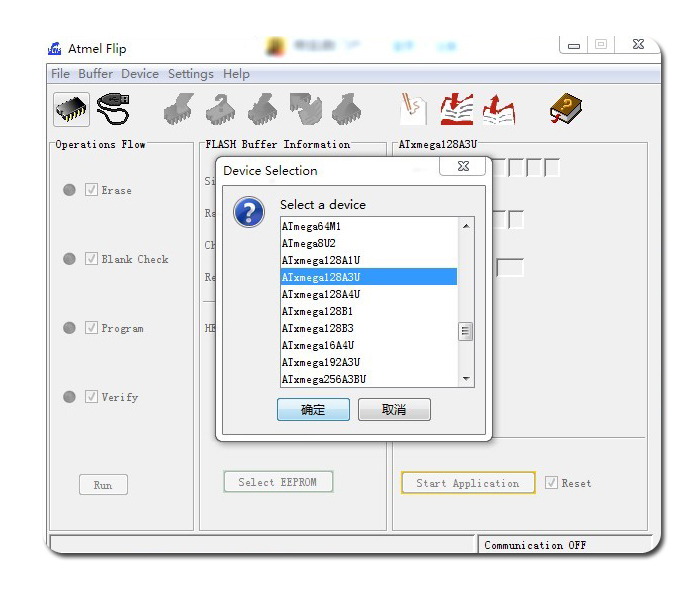
.Start FLIP
.Select the part from the device selection list available with the ‘Device’ icon.
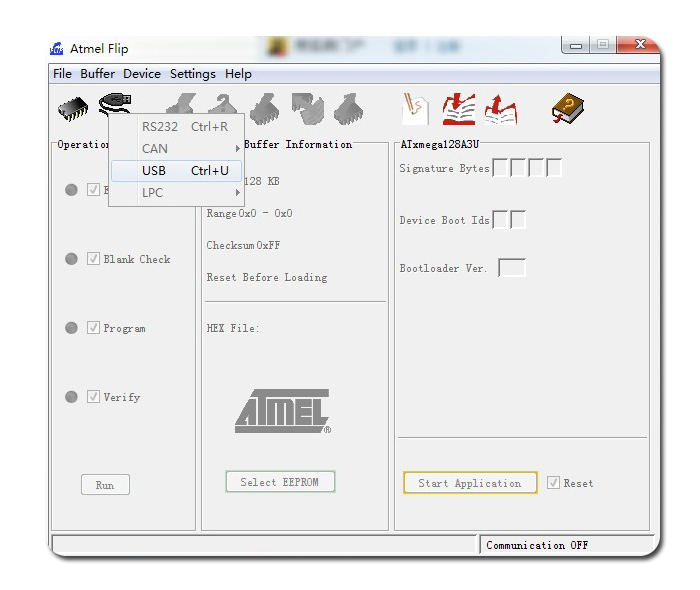
.Select “USB” as communication media available with the “USB cable icon” .
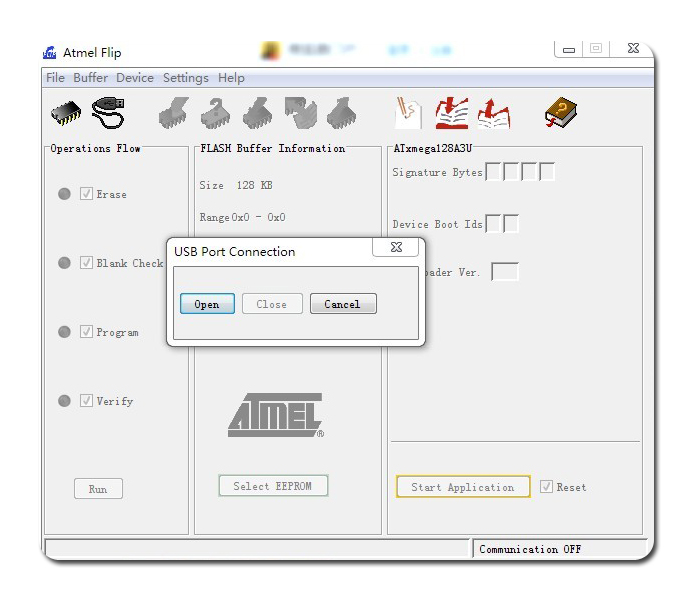
.Keep the "KEY6/BOOT"button pressed and Open the USB port to connect to the target
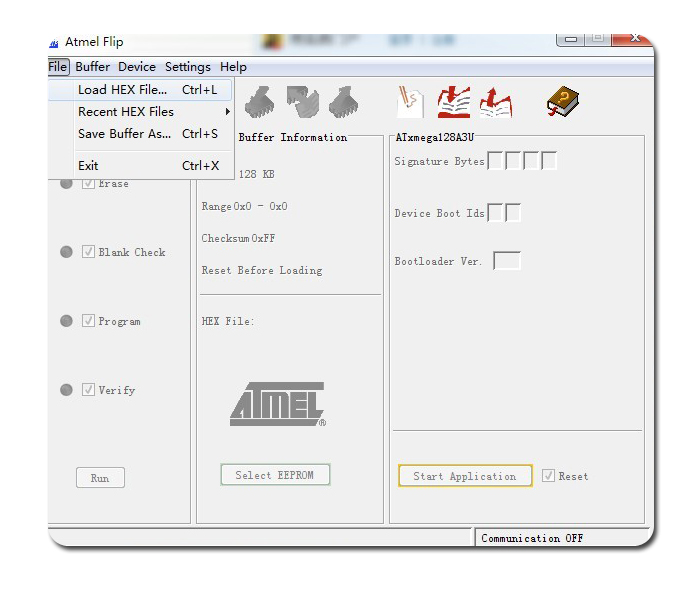
. Select the .hex file you want to download using “File”-> “Load HEX File” menu.
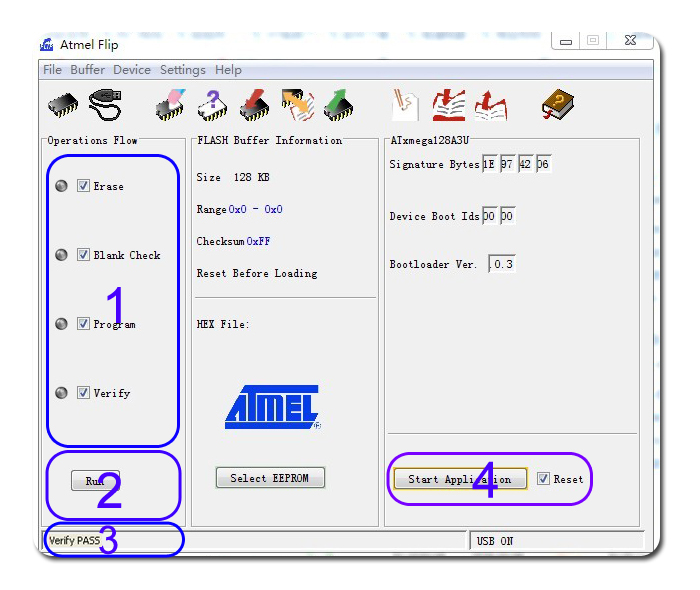
.Select the ‘Erase’, ‘Blank check’, ‘Program’ and ‘Verify’ operation check boxes (1)and press the ‘Run’ button (2)
You should get confirmation in the bottom section of the window (3) that the FLASH was successfully programmed and verified.
.Press ‘Start Application’ button (4) to execute the loaded application
Packing List
This product should include the following components:
XMEGA128A3U EK board,1 pcs
Download
1.easyXMEGA-64_Schematic
2.examples
3.new examples
4.bootloader
5.bootloader Guide
6.Application_Notes
7.datasheet
8.flip